TABLE OF CONTENTS
- Property Managers – Inviting Brand New Vendors
- Brief Overview of VendorShield Process
- Process for Brand New Vendors - VendorShield (Work Performed on the Property)
- Process for Wavier/Exempt Vendors (Emergencies Only)
- Process for Off-Site Vendors (Purchase of Supplies/Materials, Utilities, etc.)
- Process for Existing Vendors
- Syncing an Existing Vendor to VendorShield
- New Property TakeOvers
- How to See if a Vendor is Approved in Yardi
- Regional Property Supervisors – Inviting a Brand New Vendor to VendorShield
- Regional Property Supervisor - Reviewing a New Vendor Invitation
- Adding Additional Properties to a Vendors Property List
- Adding a Vendor in Yardi for Waiver/Exempt & Off-Site Vendors
- Reviewing a Pending Vendor in Yardi – Non-VendorShield Vendors
- VendorShield Customer Support
- Internal VendorShield Support
Property Managers – Inviting Brand New Vendors
Property Managers have read-only access to VendorShield and do not have access to invite vendors. Please connect with your Regional Property Supervisor to invite a vendor to VendorCafé.
Please note, vendors are required to complete their VendorCafé profile and upload their W9. The vendor's insurance agent is responsible for submitting the required COI. No documents will need to be gathered by the Property Manager. Once the vendor has been approved by the VendorShield Team, EAH Facilities, and EAH Accounting, the vendor will be added in Yardi as Approved.
Brief Overview of VendorShield Process
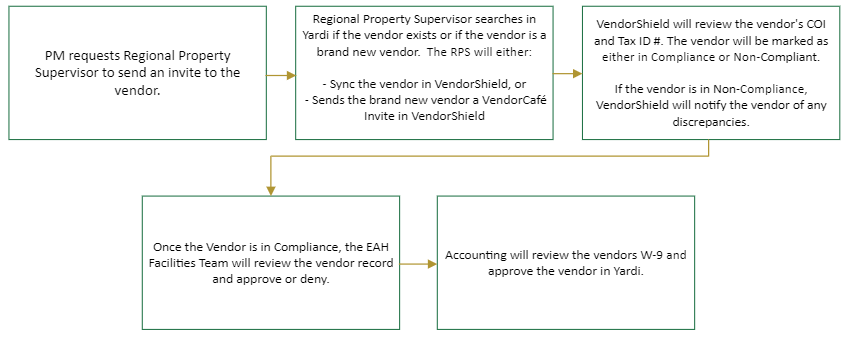
Process for Brand New Vendors - VendorShield (Work Performed on the Property)
(Used for VendorShield Certified On-Site Vendors)
- Regional Property Supervisor sends an invite to vendor through VendorShield
- The Facilities Team will review and approve the vendor in VendorShield
Note: Once the new vendor is approved in VendorShield and a V code assigned, it will flow in Voyager as Pending with no workflow attached for the AP Admin team to review
- The AP Admin Team will select VendorShield as the workflow in Yardi. The AP Admin Team will review the vendors W9 information and existing V-codes to avoid duplicates
- Approval
- Rejection
Process for Wavier/Exempt Vendors (Emergencies Only)
(Used for Non-Certified On-Site Vendors needing Proof of Insurance – Waiver/Exemption)
- Originator (Resident Manager) enters the vendor information in Yardi. Notify Regional Property supervisor.
- Regional Property Supervisors collect Certificate of Insurance & W9, attach to vendor in Yardi.
- Once all required documents are uploaded, the Regional Property Supervisor updates the vendor workflow to: Waiver/Exempt in Yardi.
- Operations (Katelyn Siegel & Sam Peterson) reviews based on the insurance requirements.
- AP Admin (Yennsen, Jack and Alex) Review W9 information and existing V-codes to avoid duplicates.
- Approval
- Rejection
Process for Off-Site Vendors (Purchase of Supplies/Materials, Utilities, etc.)
(Employees, New Utility Vendors, or Off-Site Vendors/Suppliers)
- Originator (Resident Manager) enters the vendor information in Yardi. Notify Regional Property supervisor
- Regional Property Supervisors collect W9, attach to vendor in Yardi.
- AP Admin (Yennsen, Jack and Alex) Review W9 information and existing V-codes to avoid duplicates.
- Approval
- Rejection
Process for Existing Vendors
- Regional Property Supervisor reviews vendor compliance through VendorCafé
- If Vendor is in compliance and approved, RPS sends email to AP Admin (Yennsen, Jack and Alex) at UDG-REMAPAdmin@eahhousing.org.
- AP Admin (Yennsen, Jack and Alex) add property to Vendor Property List and notify site manager and RPS.
Syncing an Existing Vendor to VendorShield
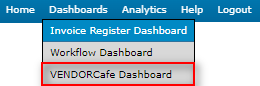
Step 1) Navigate to the VendorCafé Dashboard.
Step 2) From the VendorCafé menu bar, click on Setup à Sync Vendors.

Step 3) Search for the vendor by vcode or company name. Click Search.
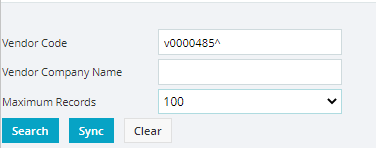
Step 4) If the vendor has not been synced, they will appear under the Un-synced tab. To sync the vendor, click the box under synced and click on the Sync button in blue.

TIP! Sometimes, we do not have the email address for the vendor on file. They will appear under the Errors tab. An institutional email should be entered on the vendor record in Yardi. Once an email is entered, you can send the invite.

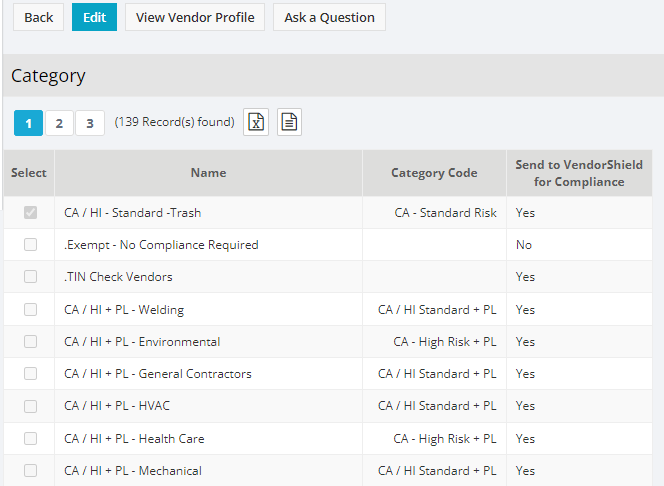
Step 5) Lastly, you need to select a vendor category. Navigating back to the home page, search for the vendor. Click Go.

Step 6) You will be defaulted to the category page for the vendor. Scroll down, click Edit and select the appropriate category for the vendor.
New Property TakeOvers
An email should be sent to the Accounting Manager and Supervisor at least 2-3 weeks before taking on new properties which lists current vendors used by the property along with copies of the latest invoices to confirm the remit to address for payments.
How to See if a Vendor is Approved in Yardi
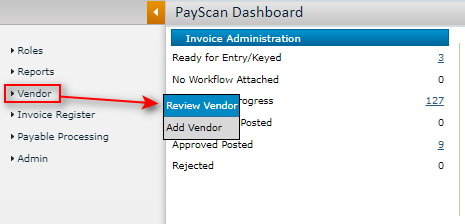
From the PAYProp 7s or PAYAprv 7s role, from the left side menu, click on Setup --> Vendor -->Review Vendor
Search for the vendor. Once you locate the correct vendor, click on Submit.

Within the vendor record, click on the General tab. Vendor’s that have the status of approved with up-to-date Liability and Workers Comp insurance dates are considered approved vendors.

Regional Property Supervisors – Inviting a Brand New Vendor to VendorShield
Step 1) Within the EAH Yardi, navigate to the ‘PayAprv 7s’ role. If you do not see the role, you may already be in it. Process to the next step.
Step 2) From the top-menu, click on Dashboards --> VendorCafé Dashboard.
Step 3) Next to the Invite New Vendor button, enter the email address or name of the vendor. Then click Invite New Vendor.
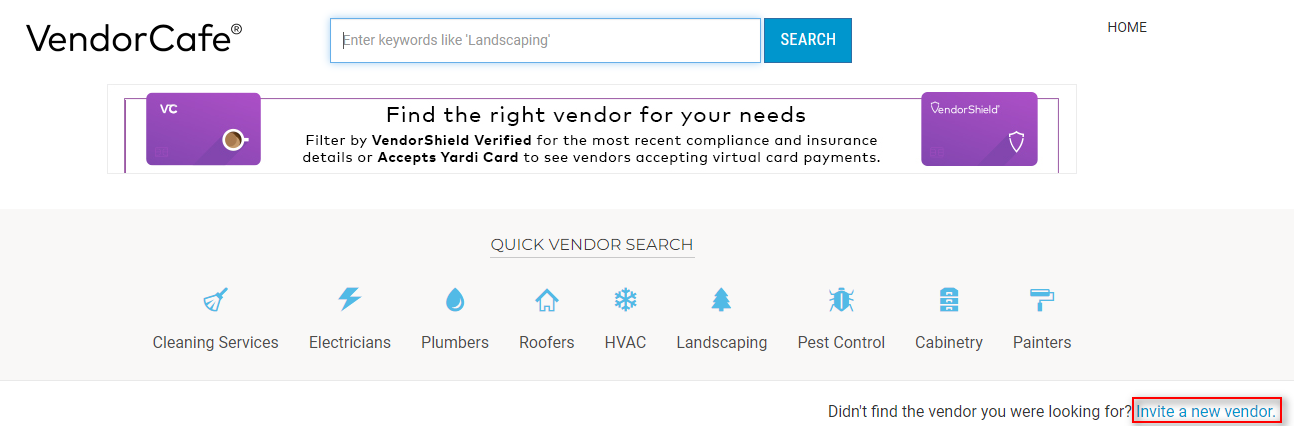
Step 4) If your vendor appears in the search list, click Invite Vendor. If you do not see the vendor, please proceed to the next step.
Step 5) Right below the Quick Vendor Search, click on Invite a New Vendor.
Step 6) Complete the Invite Vendor Form. All blue fields are required. Click Save.

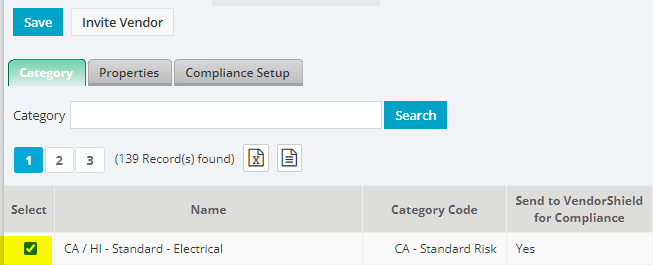
Step 7) Select the vendor category and choose the appropriate properties the vendor will be servicing by checking the box. Then hit “Invite Vendor”.

Regional Property Supervisor - Reviewing a New Vendor Invitation
You can review the new vendor invitation by clicking on Review --> Review Invite Vendor.
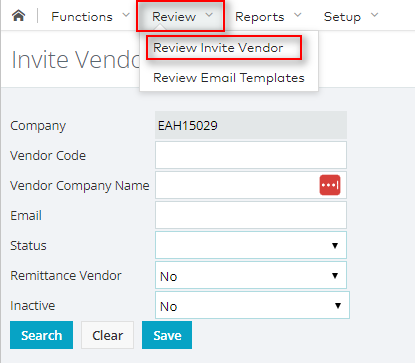
Once the search is complete, you can see where your new vendor is in the account setup process. You can also re-invite the vendor from the same screen, if they lost their VendorCafé invitation.

Adding Additional Properties to a Vendors Property List
Please submit a ticket to UDG-REMAPAdmin@eahhousing.org with the vendors name, vcode, and properties you would like to have added.
Adding a Vendor in Yardi for Waiver/Exempt & Off-Site Vendors
Step 1) For Property Managers, navigate to the PayProp 7s Role. For Reginal Property Supervisors, navigate to PayAprv 7s.
Step 2) From the left side menu, select Vendor --> Add Vendor.

Step 3) Fill in all required fields highlighted in yellow. Complete all fields and Save.
*Please make sure to update the Workflow tab found on the right side to Off-Site Vendor. If this is not completed, the Accounting Team will not be able to review the vendor request within a timely manner.

Step 4) When entering Employee records in Yardi, update the Tax Info tab as EMPLOYEE.

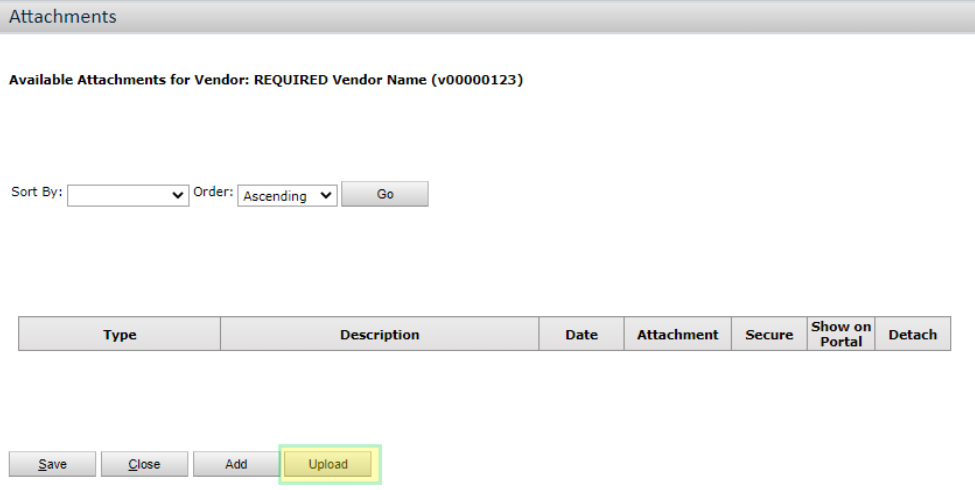
Step 5) Attach any necessary documentation by clicking on Data--> Attachment.

Step 6) When the pop-up appears, click on Upload --> Choose File --> Select the File you want to upload --> Open.


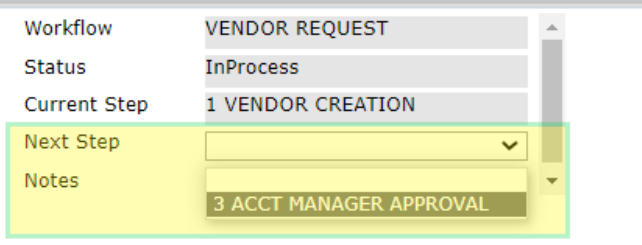
Step 7) Next, push the vendor record to the next step for approval by clicking on Edit --> Select Next Step --> Click Save. Once saved, the current step field will reflect the next approval level.
Reviewing a Pending Vendor in Yardi – Non-VendorShield Vendors
Step 1) Navigate to the PayScan Role and click on Workflow Dashboard.

Step 2) Update the filters to the following:
- Object Type – Vendor
- Workflow Status – InProgress
- Workflow Status – 1 Property Manager or 2 Regional Property Supervisor
- Show for All Users – Check the box
Click Display and click on the vendor code to review the vendors record.

Step 3) Review the vendor attachments by clicking on Data --> Attachments. After the record has been reviewed, push the vendor to the next step by clicking on Edit --> Update the Next Step dropdown.

VendorShield Customer Support
Vendors may contact VendorShield Customer Support at:
Compliance and Certification Questions
- Email: VendorShieldSupport@yardi.com
- Phone: 1-877-890-8627
Registration/Email Questions
- Email: VendorCafe_Support@yardi.com
- Phone: 1-877-890-8627
Internal VendorShield Support
EAH team members may send VendorShield escalation requests to:
For general VendorShield questions, please submit a ticket to:
Was this article helpful?
That’s Great!
Thank you for your feedback
Sorry! We couldn't be helpful
Thank you for your feedback
Feedback sent
We appreciate your effort and will try to fix the article